
How to Flush a Water Heater: A Step-by-Step Guide
Many homeowners often overlook the need to maintain their water heaters, and it’s no wonder why. Life gets busy, and hot water is something we often take for granted—until we experience a sudden drop in temperature or discolored water flowing from our taps. Regularly flushing your water heater not only helps ensure a steady supply of hot water but also extends its lifespan and improves efficiency. In this guide, we’ll go over why flushing is important and provide you with simple, step-by-step instructions to perform this essential maintenance task yourself.
Why Flushing Your Water Heater Matters
As water heaters age, sediment and mineral buildup can accumulate in the tank, particularly if you have hard water. This buildup can reduce hot water output, create strange noises, lead to rust-colored water, or even foul odors. Over time, it can corrode the tank and result in costly repairs or replacement. By flushing your water heater annually, you actively prevent these issues, ensuring you have reliable hot water when you need it.
Signs Your Water Heater Needs Flushing
Before we dive into the flushing process, it’s helpful to know when to take action. Here are some common symptoms that may indicate it’s time to flush your water heater:
- Reduced Hot Water Output: You notice less hot water during showers or when using appliances.
- Unusual Noises: Banging or popping sounds often signal sediment buildup as the water heats.
- Rusty or Discolored Water: Rust-colored water can mean sediment is mixing with your water supply.
- Foul Odors: A strange smell can arise from organic material trapped in the tank.
- Leaking Tank: Sediment can lead to corrosion, resulting in leaks and costly damage.
If you observe any of these signs, it’s time to flush your unit.
Materials You’ll Need
To effectively flush your water heater, gather some basic materials:
- Garden hose
- Screwdriver or pliers
- A bucket or drainage container
- Optional: White vinegar or hydrogen peroxide for cleaning
- Protective gear: gloves and safety glasses
Step-by-Step Instructions for Flushing Your Water Heater
Step 1: Turn Off the Power Supply
Safety first! If you have an electric water heater, turn off the power at the breaker box. For gas heaters, turn the gas supply valve to the off position. This step prevents accidents and keeps you safe from scalding water during the flush.
Step 2: Shut Off the Water Supply
Locate the cold water supply valve, usually found at the top of your tank, and turn it to the off position. This prevents new water from entering the tank during the flush.
Step 3: Open the Pressure Relief Valve
Next, open the pressure relief valve at the top of the tank. This step will release any built-up pressure inside, making it safer for you to drain the water.
Step 4: Connect the Garden Hose
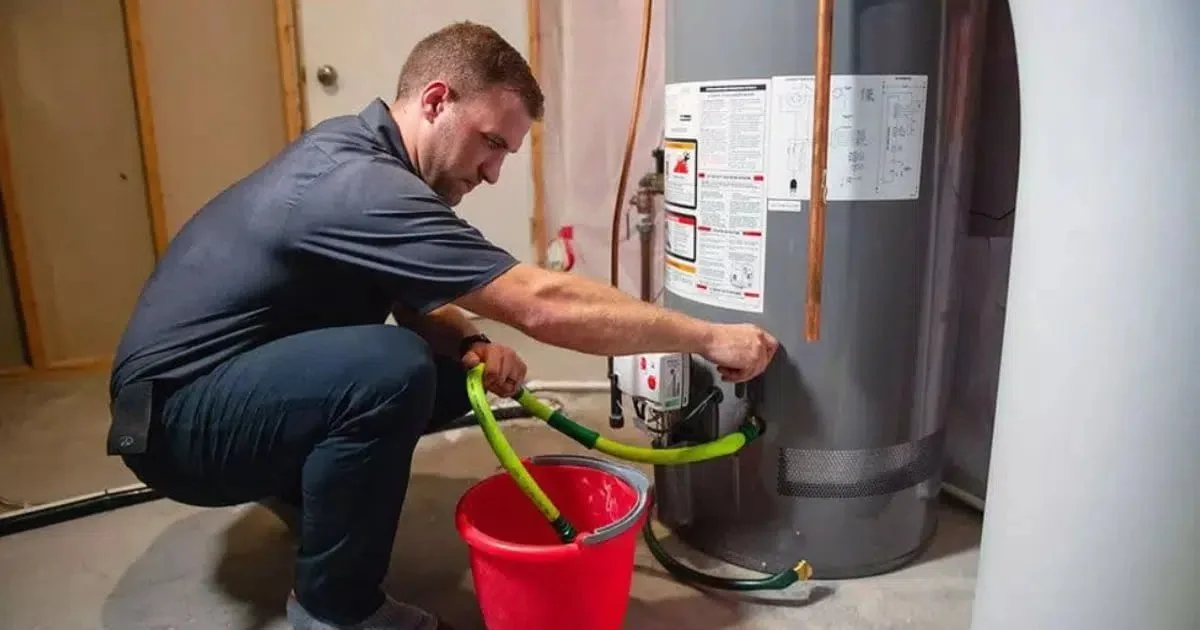
Attach one end of the garden hose to the drain valve located near the bottom of the tank. The other end should go into a drainage container outside or in an appropriate draining area.
Step 5: Drain the Tank
Open the drain valve and let the water flow out. This could take anywhere from 20 to 60 minutes, depending on your tank size and the amount of sediment. Be cautious as the water may be hot.
Step 6: Flush the Tank
Once drained, it’s time to flush any remaining sediment. With the drain valve still open, turn on the cold water supply for a few seconds. This will help stir up stuck sediment. Repeat until the water runs clear, which indicates the sediment has been adequately cleared.
Step 7: Optional Cleaning
If you see mineral buildup, consider using white vinegar or hydrogen peroxide for a deeper clean. Fill the tank with your cleaning solution and let it sit for several hours. Drain and flush it with cold water until clear.
Step 8: Refill and Restart
After completing the flushing process, close the drain valve and disconnect the garden hose. Turn on the cold water supply valve to refill the tank. Once full, turn the power or gas supply back on, allowing the water heater to heat up to your desired temperature.
Alternative Methods for Flushing
If you’re dealing with a significant amount of sediment buildup or have a very large tank, consider alternative flushing methods like:
- Gravity Drain Method: Ideal for tanks with minimal sediment. Simply use gravity to drain water from the tank.
- Pump-Out Method: In cases of severe sediment build-up, a pump can remove water faster and more efficiently.
- Vacuum Method: For stubborn sediment that won’t budge, using a wet/dry vacuum can help remove it from the tank.
How Long Does It Take to Flush a Water Heater?
On average, expect the entire flushing process to take about 30-90 minutes, depending on the sediment levels. Patience is key—thoroughness will pay off in better water quality and heater reliability.
Conclusion
By regularly flushing your water heater, you’re not just maintaining your home; you’re also ensuring that your hot water continues to flow reliably for years to come. This simple maintenance task helps avoid larger issues down the line, saving you time and money. So grab your tools, set aside a little time, and take charge of your water heater health—you’ll enjoy the peace of mind that comes with knowing your home is running smoothly.