The Surprising Reason People Are Putting Dishwasher Tablets in Garbage Bags
Cleaning oven racks is one of those chores most people put off for as long as possible. Grease, baked-on food, and years of cooking residue can leave them looking almost impossible to clean.
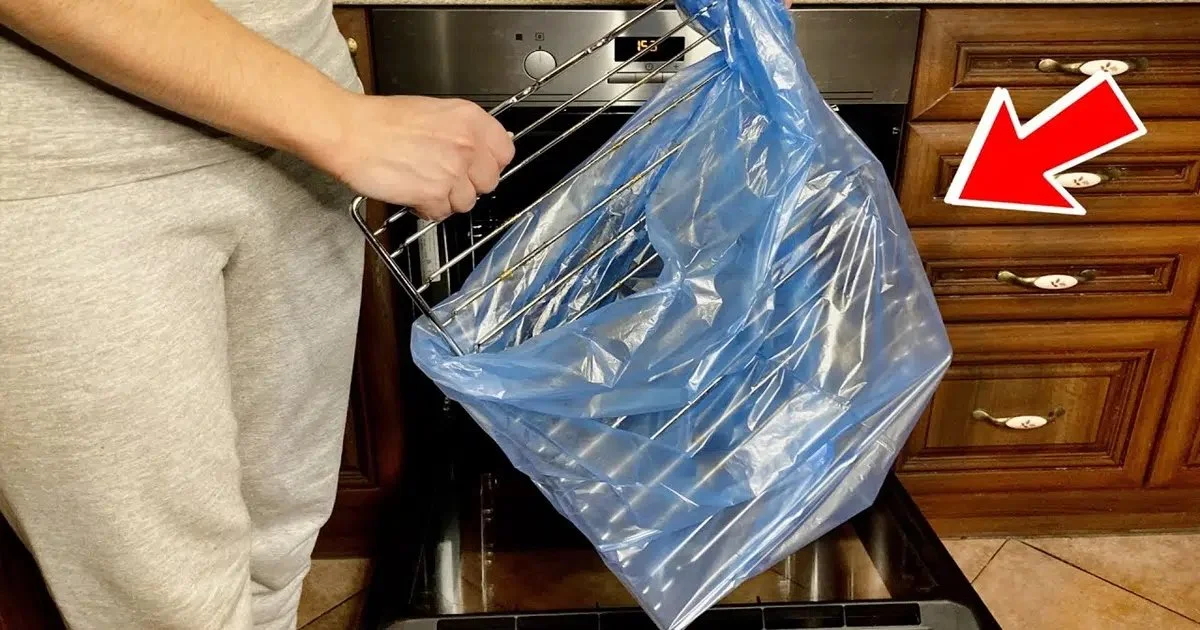
Recently, a surprisingly simple cleaning trick has gained attention online: placing oven racks inside a large garbage bag with a dishwasher tablet and warm water. The long soaking time helps loosen stubborn grease, making the final scrubbing much easier.


If you’re looking for a low-effort way to refresh your oven racks, here’s how the method works and what you should know before trying it.
Why Dishwasher Tablets Work
Dishwasher tablets are designed to break down food residue, grease, and baked-on deposits inside dishwashers.
When a tablet dissolves in warm water, the resulting cleaning solution can help soften grease and food residue. Keeping the racks submerged or thoroughly wet for several hours gives the solution more time to work, so hardened grime may become easier to remove.
The method isn’t magic, though. Extremely heavy buildup may still require additional scrubbing.
What You’ll Need
Before getting started, gather:
- One large, heavy-duty garbage bag
- One dishwasher tablet
- Warm water
- A sponge or non-scratch scrubber
- Rubber cleaning gloves
- Old towels or newspapers to protect the floor


Choose a sturdy garbage bag to reduce the chance of leaks while the racks soak.
How to Clean Oven Racks With a Dishwasher Tablet
1. Place the Racks in the Bag
Carefully slide the dirty oven racks into a sturdy garbage bag.
Place the bag somewhere suitable for wet cleaning, such as a bathtub or another protected area. Put towels underneath the bag in case it leaks.


2. Add the Cleaning Solution
Place one dishwasher tablet inside the bag.
Add enough warm water to dissolve the tablet and thoroughly wet the racks. You don’t need to completely fill the bag.
Avoid boiling water because it can soften or damage some garbage bags and increases the risk of burns.
3. Seal the Bag
Tie the garbage bag securely so the cleaning solution remains in contact with the oven racks.
Check that the bag isn’t leaking before leaving it to soak.
4. Let It Soak
Allow the racks to soak for at least several hours or overnight.
The extended contact time helps soften baked-on grease and food residue.


5. Wipe and Scrub the Racks
Put on rubber gloves before opening the bag.
Remove the racks and use a sponge or non-scratch scrubber to remove the loosened residue.
Most of the grime should be easier to remove after the prolonged soak, although stubborn areas may require additional attention.
6. Rinse Thoroughly
Rinse the racks very well with clean water.
This step is important because you don’t want cleaning-product residue remaining on surfaces that will be exposed to heat and food.
Dry the racks completely before putting them back into the oven.


Important Safety Tips
Keep these precautions in mind:
- Wear rubber gloves when handling the cleaning solution.
- Use warm rather than boiling water.
- Never mix dishwasher detergent with bleach, ammonia, or other cleaning products.
- Keep children and pets away from the soaking area.
- Protect floors and surfaces from possible leaks.
- Rinse the racks thoroughly before putting them back in the oven.
- Check the oven manufacturer’s instructions before soaking racks, especially if they have a special finish or coating.
Can You Use This Method on Other Items?
A similar soaking approach may work for some metal kitchen items with baked-on grease, such as:
- Stove grates
- Grill grates
- Metal baking trays
- Some range-hood filters
However, don’t assume every metal item is safe to soak. Check the manufacturer’s care instructions first. Certain finishes can discolor, corrode, or become damaged by prolonged exposure to cleaning products.
Is It Better Than Traditional Oven Cleaners?
The biggest advantage is convenience.
Instead of spending a long time scrubbing dry, hardened grease, you let the cleaning solution work for several hours first.
However, the method isn’t necessarily better for every situation. Extremely dirty racks may still require scrubbing, and some oven racks have finishes that shouldn’t be exposed to prolonged soaking.
For particularly stubborn buildup, following the oven manufacturer’s recommended cleaning method is the safest choice.
Tips to Keep Oven Racks Cleaner Longer


Cleaning is easier when grease doesn’t have months to accumulate.
Try to:
- Wipe up spills after the oven has completely cooled.
- Deep-clean the racks every few months.
- Use suitable baking sheets to catch food drips.
- Avoid allowing large amounts of grease to repeatedly bake onto the racks.
- Check the racks regularly instead of waiting until they’re heavily coated.
Expected Results
After soaking and cleaning, your oven racks should have significantly less:
- Baked-on grease
- Food residue
- Sticky buildup
- Darkened deposits
Very old or heavily damaged racks may not return to their original appearance, even after thorough cleaning.
Final Thoughts
The dishwasher-tablet-and-garbage-bag trick can be a convenient way to loosen stubborn grease from oven racks without spending hours scrubbing.
The key is the long soaking time, which gives the cleaning solution an opportunity to soften hardened residue before you tackle it with a sponge.
Just remember to use warm water, protect the surrounding area from leaks, wear gloves, never mix cleaning products, and rinse the racks thoroughly before returning them to the oven.
With a little patience, a nasty oven-rack cleaning job can become considerably easier.