

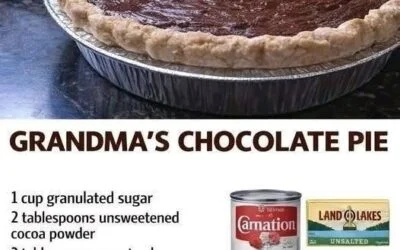
Let the pie cool, then refrigerate it until thoroughly chilled and set.
This is another place where patience pays off.
Cutting a chocolate custard pie while it’s still warm can give you a filling that spreads instead of holding its shape.
For clean slices, use a sharp knife and wipe the blade between cuts.
Then add whipped cream just before serving if desired.
Why Is My Chocolate Pie Runny?
If your pie isn’t setting properly, don’t immediately assume the recipe failed.
There are a few likely reasons.
It wasn’t cooked long enough
Cornstarch needs enough heat to thicken the mixture properly.
If you removed the custard while it was still quite thin, refrigeration may not completely solve the problem.
The measurements were off
Too little cornstarch can leave the filling loose.
Too much can make it overly firm or pasty.
For custard recipes, measuring carefully matters.
It hasn’t chilled long enough
A warm pie will always be softer than a properly chilled one.
Give it enough time in the refrigerator before judging the final texture.
The filling was overheated
Cooking too aggressively can cause problems with both the dairy and eggs.
Medium heat and steady stirring give you much better control.
Why Did My Filling Turn Lumpy?
Lumps usually come from one of two problems:
The dry ingredients weren’t fully incorporated, or
the egg yolks cooked too quickly.
That’s why the recipe starts by thoroughly whisking the sugar, cocoa, cornstarch, and salt together.
And that’s why the yolks are tempered instead of having hot custard poured directly over them.
If you follow those two steps carefully, the filling should stay much smoother.
The Trick to Avoiding a Scorched Bottom
Once the custard starts thickening, don’t just stir the surface.
Make sure your whisk or spatula reaches the bottom and corners of the saucepan.
Those areas can get hotter than the rest of the mixture.
If you notice the mixture catching on the bottom, lower the heat and keep stirring.
A heavy-bottomed saucepan can also make temperature control easier.
Can You Use a Different Milk?
Whole milk gives this pie its classic creamy texture.
You can experiment with lower-fat milk, but the finished filling may be less rich.
If you’re changing the dairy, don’t assume the result will be identical.
Fat affects both mouthfeel and richness, so whole milk is the safest choice when you’re trying to reproduce that classic texture.
Should You Use Cocoa Powder or Melted Chocolate?
For this style of old-fashioned pie, cocoa powder gives you a straightforward chocolate flavor without requiring you to melt chocolate separately.
Melted chocolate can create a richer, more intense dessert, but it also changes the balance of fat and solids in the filling.
If you’re making this recipe for the first time, stick with the listed cocoa powder rather than changing several ingredients at once.
Once you know how the original version behaves, variations are easier to troubleshoot.
Easy Ways to Finish the Pie
The simplest topping is often the best.
Whipped Cream
Add a generous spoonful to each slice.
The cold, airy cream contrasts beautifully with the dense chocolate filling.
Chocolate Shavings
A few curls of chocolate can make the pie look more finished without making it overly sweet.
Light Cocoa Dusting
A very small dusting of cocoa powder gives the top a classic bakery-style appearance.
Meringue
For a more traditional Southern presentation, cover the warm filling with meringue and brown the topping according to your meringue recipe.


5 Mistakes That Can Ruin a Chocolate Pie
1. Turning the heat too high
High heat can scorch the milk mixture before the filling thickens properly.
Better: Use medium heat and stay with the saucepan.
2. Stopping the stirring
Custard can stick quickly once it becomes thick.
Better: Keep stirring and scrape the bottom as you cook.
3. Skipping the tempering step
Adding hot custard directly to cold egg yolks can cook the yolks too quickly.
Better: Slowly warm the yolks with a few spoonfuls of hot filling first.
4. Pouring into a warm crust
A warm crust can become softer under hot filling.
Better: Let the baked crust cool first.
5. Cutting before the pie has chilled
Even a properly made custard needs time to firm.
Better: Refrigerate it thoroughly before slicing.
Can You Make This Pie Ahead?
Absolutely.
In fact, this is one of the better desserts to make ahead because the filling needs time to cool and set.
Prepare the pie, let it cool, then refrigerate it covered.
If you’re using whipped cream, adding it closer to serving will usually give you a fresher appearance and texture.
Because this pie contains dairy and eggs, keep it refrigerated rather than leaving it at room temperature for extended periods.
How to Get Cleaner Slices
There’s a simple trick that makes a noticeable difference.
Run a sharp knife under hot water, wipe it dry, then make the cut.
Repeat between slices if necessary.
You don’t want the knife soaking wet—just warm.
The warm blade glides through the chilled filling more easily and gives you cleaner edges.
What Makes This Recipe Feel “Old-Fashioned”?
It’s not a complicated ingredient list.
It’s the technique.
There’s something different about cooking a chocolate custard slowly on the stovetop, watching it thicken, tempering the egg yolks, and waiting for the finished pie to chill.
The process is simple, but it rewards attention.
And unlike some modern desserts, you don’t need layers of decoration to make it special.
A flaky crust, smooth chocolate filling, and a little whipped cream are enough.
The Bottom Line
A good old-fashioned chocolate pie isn’t difficult because of the ingredients.
It’s difficult only if you rush the parts that matter.
Cook the filling until it’s genuinely thick, temper the egg yolks carefully, keep the mixture moving, let the crust cool, and give the finished pie enough time to chill.
Those few details are what turn a saucepan of chocolate custard into a pie that slices cleanly while staying rich and creamy inside.
And that’s exactly what you want when that first slice hits the plate.